 Add Row
  Add
Add 

Understanding Oil Leaks: A Common Issue for Vehicle Owners
Oil leaks can be one of the most frustrating experiences for any vehicle owner. Whether you drive a car or a truck, discovering oil puddles on your driveway can be alarming. However, diagnosing and fixing oil leaks doesn’t have to be a daunting task. With a little patience and the right guidance, many people can successfully manage oil leak repairs themselves.
In 'What's Causing the Major Oil Leak in Your Car or Truck? Replace This Part Yourself for Major Savings,' the discussion dives into practical oil leak diagnosis, exploring key insights that sparked deeper analysis on our end.
How to Diagnose an Oil Leak Effectively
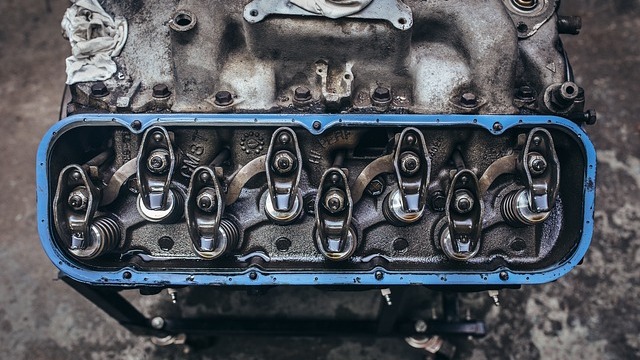
Diagnosing the source of an oil leak begins with understanding the nature of oil leakage itself. The key principle to remember is to follow gravity: start your inspections from the top of the engine and work your way downward. This is crucial because oil can travel downwards, leading you to think your oil pan is leaking when, in fact, the problem originates from higher up.
Start by checking components like the valve covers, oil filler cap, and the intake manifold. Use a bright light to spot any signs of wetness or seepage, as dry areas indicate there may not be a problem there.
The Green, Yellow, Red Method Explained
When inspecting for oil leaks, a helpful way to categorize your findings is by using a traffic light analogy. Think of it as a system where:
Green: No leaks observed, everything is functioning well.
Yellow: Seepage is present—this is when oil shows signs of wetness, but it isn't actively drenching components.
Red: There’s an active drip, indicating a major leak that needs immediate attention.
By using this method, you can confidently assess how urgent your repair needs are.
Common Causes of Major Oil Leaks
One of the most common culprits for oil leaks is a damaged oil pan gasket. In the video, we see a case where the oil pan was leaking extensively because the gasket had slipped due to over-tightening. Repairs often involve replacing the gasket and ensuring that the pan is correctly secured without excess torque.
It might also be wise to examine the seals around your timing chain and the water pump, as these can show signs of wear and contribute to an oil leak as well.
Taking Preventive Steps After a Repair
Once you've conducted your repair, don't forget to change your oil and filter. This will ensure there’s fresh oil in your car, minimizing the risk of residue buildup or contamination. Following an oil repair, it’s wise to monitor the vehicle over the next few thousand miles. Check periodically to ensure no new leaks appear—a practice that even professionals recommend.
Final Thoughts: The Value of Understanding Oil Leaks
Grasping the basics of diagnosing oil leaks not only empowers vehicle owners but also saves money on repairs, should you choose to tackle it yourself. Understanding your car's mechanisms and the nature of oil flow will make you feel more confident in car maintenance. Remember that a little knowledge goes a long way, and the online resources available today can guide you through your DIY repair journey.
Empower yourself with knowledge and learn the value of preventative maintenance.


 Add Row
  Add
Add 
Write A Comment