Add Row
Add Element
cropper
update
Auto Care Daily
update
Add Element
  • Home
  • Categories
    • Maintenance
    • Repairs
    • Diagnostics
    • Safety
    • Tips
    • Troubleshooting
    • Car Buying Tips
    • Extra News
    • Business Directory
2 Minutes Read

How to Identify and Fix Oil Housing Leaks in Your Car

Mechanic inspecting engine oil housing for oil leak signs in warm light.


Understanding Oil Housing Leaks in Your Car

As a car owner, keeping your vehicle in top shape is vital for safety and performance. One issue that might pop up is an oil housing leak. This article breaks down what you need to know about oil housing leaks, including their causes and how they can affect your car.


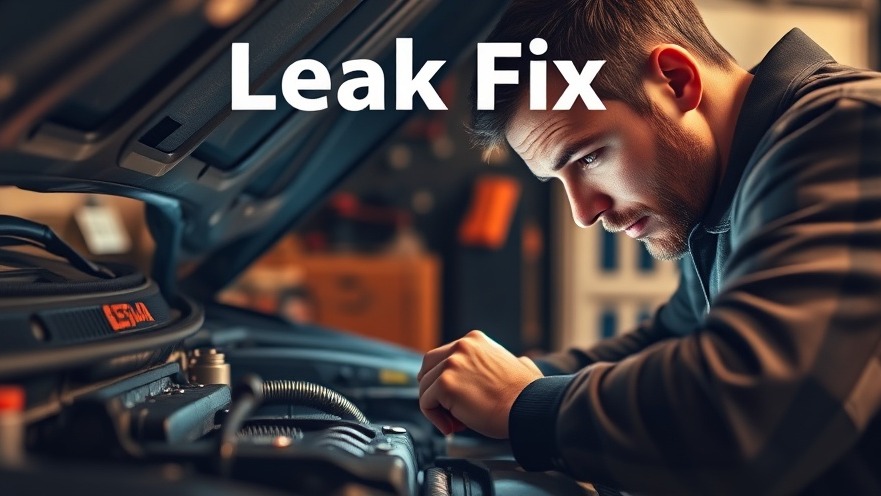
In 'Click Link for Full Video! - Oil Housing Leak,' the discussion dives into oil housing leaks, exploring key insights that sparked deeper analysis on our end.

What is an Oil Housing Leak?

Oil housing leaks occur when oil seeps from the engine oil housing—an essential component that stores and circulates engine oil. If this part gets damaged or worn out, it can lead to serious engine problems due to insufficient oil supply.

Reasons for an Oil Housing Leak

Several factors may cause oil housing leaks. Common reasons include:

  • Wear and Tear: Over time, engine components naturally degrade. Heat and friction can cause gaskets and seals to wear out, leading to leaks.

  • Improper Installation: If the oil housing is not installed correctly during repairs or routine maintenance, it may not seal tightly, resulting in oil leaks.

  • Temperature Changes: Fluctuations in temperature can cause parts to expand and contract, stressing the seals and gaskets, which may lead to leaks.

Signs of an Oil Housing Leak

Being aware of the signs of an oil housing leak is crucial. If you notice:

  • Oil stains under your vehicle

  • A drop in oil pressure

  • An unusual smell reminiscent of burning oil

It’s time to investigate further. Ignoring these signs can lead to more significant engine issues.

How to Address an Oil Housing Leak

If you suspect an oil housing leak, addressing it promptly is important. Here are some steps you can take:

  • Check Oil Levels: Regularly monitor your oil levels. If they’re low, it can be a sign of a leak.

  • Visit a Mechanic: A professional mechanic can diagnose and fix leaks, ensuring your car runs smoothly.

  • Preventive Maintenance: Regular maintenance checks can help catch potential issues early, preventing leaks before they start.

Conclusion: Keeping Your Car Safe

Staying informed about your car’s needs is essential. Understanding common issues like oil housing leaks helps you make informed decisions and keep your vehicle in excellent condition. If you see any signs of an oil leak, don’t ignore them!


Troubleshooting

Write A Comment

*
*
Related Posts All Posts
11.04.2025

Essential Issues and Repairs for the 2010-2019 Ford Taurus

Explore common problems Ford Taurus 2010-2019 may face, including HVAC and transmission issues, and learn how to address them effectively.

10.31.2025

Troubleshooting Starting Issues: Quick Checks You Can Do

Discover effective tips for troubleshooting car starting issues, including battery problems and starter sounds that every car owner should know.

10.24.2025

Unlock a Smooth Ride: How to Reset Your Car's ECU with Easy Hacks

Update Understanding the Importance of Your Car's ECU Did you know that a whopping 70% of cars on US roads are experiencing some sort of glitch with their Engine Control Unit (ECU)? This data reflects a significant issue that many car owners might not even be aware of. The ECU serves as your vehicle's brain, regulating everything from fuel efficiency to idle speed. An underperforming ECU can lead to hesitation, rough idling, and increased fuel consumption, even in brand-new models. Understanding how to reset your ECU can save you time and money, ensuring your vehicle runs smoothly.In 'Is Your Car Acting Up? Try THIS Quick ECU Reset Hack!', the discussion dives into effective methods for resetting your ECU, exploring key insights that sparked deeper analysis on our end. Method One: The Battery Disconnect Reset One effective way to reset your ECU is by disconnecting the car’s battery. First, ensure the car is parked on flat ground and completely off before you start. Disconnect the negative battery terminal followed by the positive terminal. A crucial step often skipped is pressing the brake pedal for about 15-20 seconds to discharge any residual electrical charge. This reset clears any bad habits the ECU has accumulated over time. Leave the battery disconnected for at least 20-30 minutes before reconnecting. Don’t forget to hook the terminals back in the correct order: positive first, then negative. Using OBD2 Tools for an Efficient Reset Have you heard about the OBD2 port located under your dashboard? This handy tool can play a vital role in diagnosing and resetting your vehicle’s problems without the hassle of disconnecting the battery. To use an OBD2 scanner, plug it into the port, turn the key to the 'on' position, and allow the scanner to communicate with your ECU. Make sure to read any diagnostic trouble codes (DTCs) before erasing them—this allows you to gain insight into your vehicle’s specific issues. Once you clear the codes, your ECU will refresh without losing your radio presets or settings. Method Three: Pulling the ECU Fuse Another straightforward method for resetting your ECU involves pulling out the appropriate fuse. Locate your vehicle’s fuse box (usually under the hood) and find the ECM or ECU fuse. Ensure the keys are out of the ignition before removing the fuse carefully. Wait around 10 minutes to drain the memory in that circuit; then, simply replace the fuse. This brief solution can often eliminate the pesky check engine light by restoring the ECU to its default settings. Key Cycling: An Easy Way to Reset An even simpler method, with no tools required, is the ignition or key cycle reset. By turning your key to the 'on' position without starting the car, holding it for around 10 seconds, and then turning it off—repeating this a few times—you can force the ECU to reinitialize. This method is effective for many vehicles and can resolve minor issues such as rough idling. Addressing Idle Problems: Throttle Body Relearn After resetting the ECU, it’s essential to allow the system to relearn its settings. If you’ve cleaned the throttle body or performed significant maintenance, follow a specific drive cycle to allow the ECU to understand how to manage air intake correctly. Avoid loading the car with too many electrical accessories during this process, which can mess with the relearning. Investing in Professional Help When Needed If at-home resets aren’t yielding the results you need, it might be worthwhile to seek out professional help. Advanced scan tools and dealer visits can provide comprehensive resets and updates that DIY methods simply can’t achieve. For persistent errors, these professional interventions ensure that your car is running on the latest software and firmware. Bonus Tip: Preparing for Vehicle Inspections A crucial piece of advice is to not rush to your inspection station immediately after an ECU reset. This task also resets all readiness monitors, and cars can fail inspection if these monitors don't pass. To avoid this pitfall, complete a proper drive cycle to ensure everything is in working order before heading out for an inspection. Now that you are aware of these seven ECU reset methods, it's essential to apply them thoughtfully. Make sure to follow the proper steps to avoid complications, and always consult your vehicle’s manual for specific instructions. A well-cared ECU can significantly improve your driving experience.

Terms of Service

Privacy Policy

Core Modal Title

Sorry, no results found

You Might Find These Articles Interesting

T
Please Check Your Email
We Will Be Following Up Shortly
*
*
*